Introduction to Chess Checkmating Patterns
In chess, checkmating is the ultimate goal, where the opponent’s king is placed in check and has no legal move to escape.

Recognizing checkmating patterns is an essential skill for both beginners and advanced players because it enables players to spot opportunities for victory and defend against threats. Understanding common checkmate patterns helps players win games more efficiently and create threats that their opponents cannot escape. Here are some of the most fundamental and widely used checkmating patterns.
Table of Contents
1. The Back Rank Mate
The back rank mate is one of the simplest checkmate patterns to recognize. It occurs when the opponent’s king is on the back rank (the 1st or 8th row) and is blocked by its own pawns, leaving no escape squares for the king. A piece, usually a rook or queen, delivers a check along the back rank, and the opposing king cannot escape due to its own pawns.
Example: If a black king is placed on h8 and pawns occupy the f7, g7, and h7 squares, and White places a rook on the h-file (e.g., Rh8#), the Black king is checkmated. The pawns block the escape routes, and the king has no legal moves.
2. The Smothered Mate
The smothered mate is a more intricate checkmate pattern that occurs when the opposing king is surrounded by its own pieces, typically pawns, and a knight delivers the checkmate. The knight checks the king, and the king cannot escape because all its escape squares are covered by its own pieces.
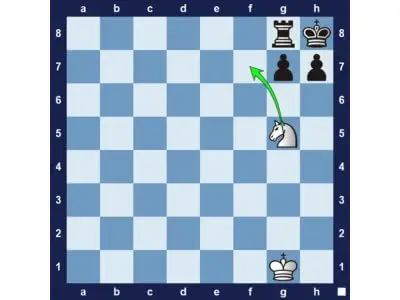
Example: In a typical smothered mate, a black king might be surrounded by pawns on g7, f7, h7, and a knight on f6. The White knight moves to g8 (Ng8#), delivering checkmate. The Black king cannot escape because the pawns and its own knight cover the adjacent squares.
3. The Queen and King Mate
The queen and king checkmate pattern is one of the fundamental endgame techniques. In this pattern, the queen and king work together to checkmate the opposing king. The queen restricts the movement of the opposing king while the friendly king steps in to provide support and limit the enemy king’s mobility.
Example: Imagine a scenario where the White queen is placed on e7, and the White king is on f6. The Black king is placed on h8. The White queen moves to e8 (Qe8#), supported by the White king. The Black king cannot escape because it is blocked by its own pieces and the White king is cutting off its escape.
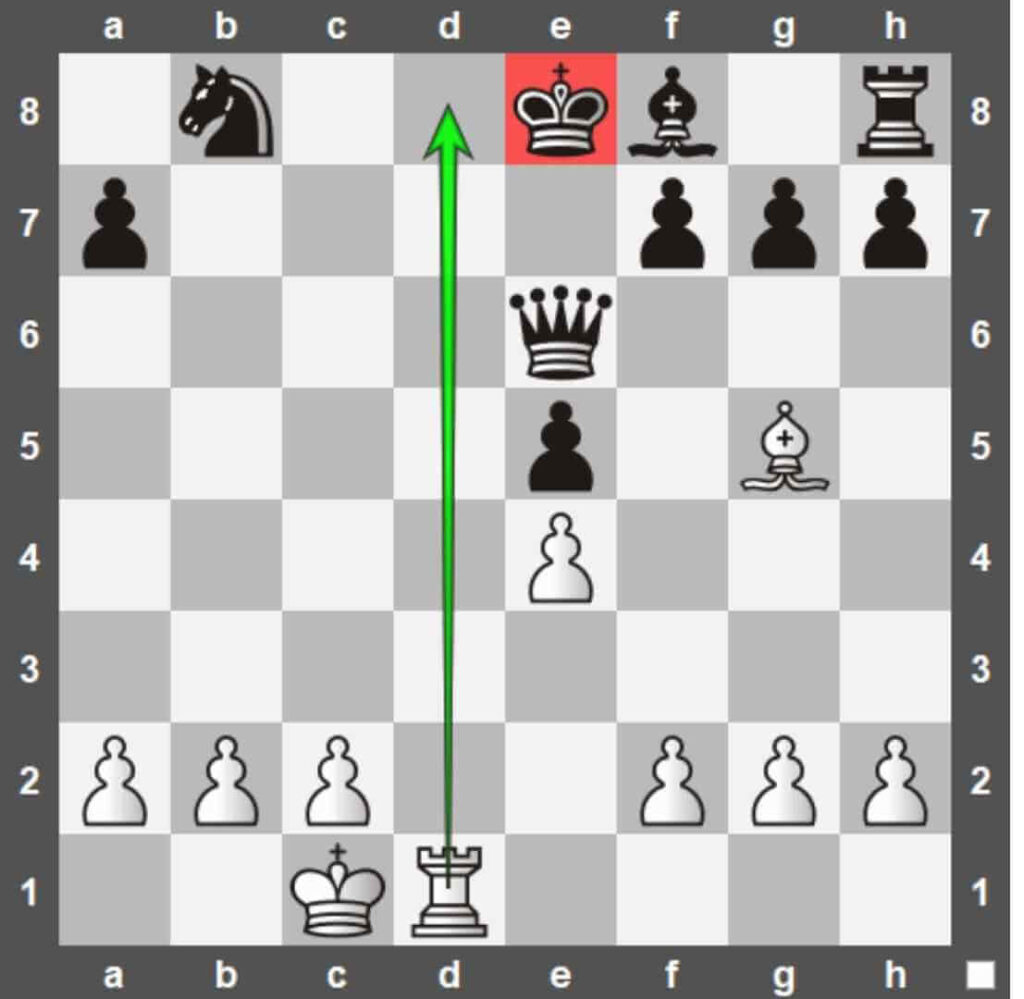
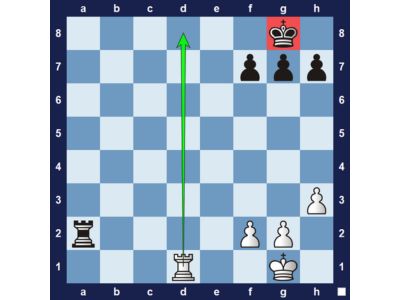
4. The Rook and King Mate
Similar to the queen and king checkmate, the rook and king checkmate requires coordination between the two pieces. The rook confines the enemy king to the edge of the board, while the king steps in to restrict the remaining squares and deliver checkmate.
Example: If the White rook is placed on the 7th rank (say, on d7) and the White king is nearby on the 6th rank (say, on e6), and the Black king is placed on the 8th rank, the White rook moves to d8 (Rd8#), delivering checkmate. The Black king cannot escape because it is blocked by its own pieces and the White king.
5. The Bishop and King Mate
Although less common than the rook or queen and king checkmate patterns, the bishop and king checkmate can occur in certain endgames. In this case, the bishop helps restrict the enemy king’s movement, and the king steps in to control key squares.
Example: In a scenario where White has a bishop on c6 and the White king is placed on d6, while the Black king is on h8, the White king moves to e7 (Ke7#). The bishop controls the a1-h8 diagonal, and the Black king is trapped.
6. The Two Knights Mate
The two knights checkmate is a rare but elegant pattern that involves both knights working together to checkmate the opposing king. This pattern typically happens in the endgame when the opponent’s king is restricted to a small area, usually near the corner of the board.
Example: If the White knights are placed on f7 and g6, and the Black king is positioned on h8, the knights work together to deliver a smothered checkmate. White’s knights cover the escape squares, and the Black king has no legal move, resulting in a checkmate.
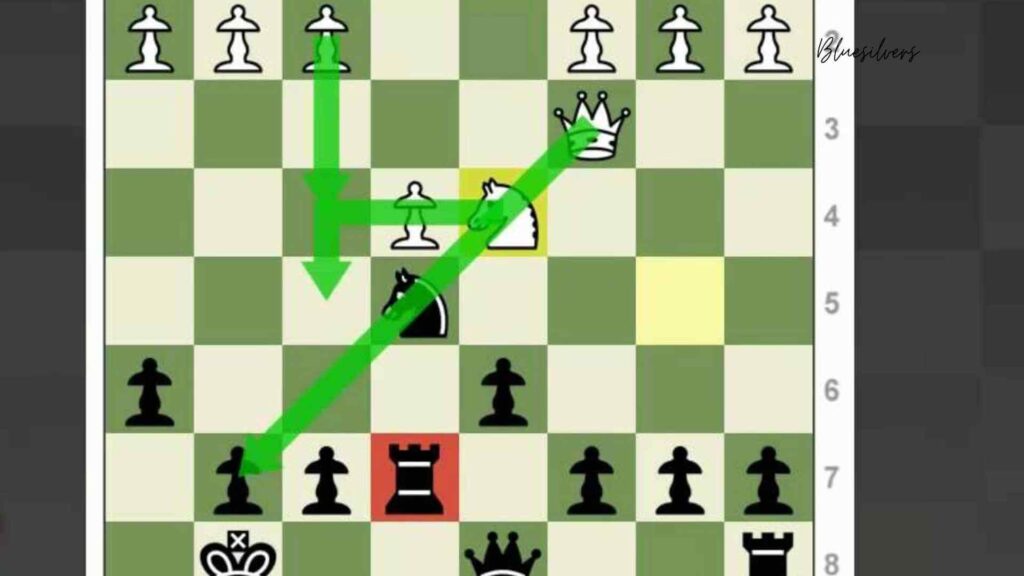
7. The Ladder Mate
The ladder mate is a classic checkmating pattern that occurs when a queen or rook uses the board’s ranks or files to systematically push the opposing king toward the edge of the board, ultimately delivering checkmate. This pattern is most effective when the attacking side has a significant material advantage and the opposing king is unable to escape.
Example: In a typical ladder mate, the White queen might start on d7, pushing the Black king towards the edge of the board. The White queen moves to d8 (Qd8#), and the Black king, cornered on h8, has nowhere to escape.
8. The Arabian Mate
The Arabian mate is a checkmate pattern involving a knight and a rook. The rook usually cuts off the opposing king’s movement along a row or file, while the knight delivers the check, often from an unexpected angle.
Example: If the White knight is on f6 and the White rook is on e8, with the Black king on h8, the White knight moves to g8 (Ng8#), delivering checkmate. The rook on e8 controls the e-file, and the knight covers the necessary escape squares, leading to checkmate.
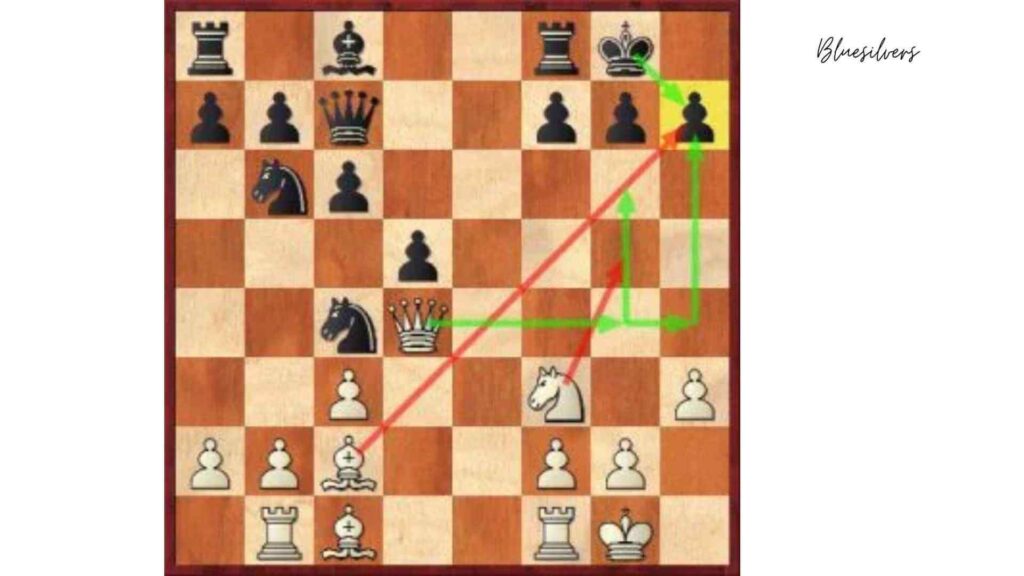
9. The Anastasia’s Mate
Anastasia’s mate is a beautiful pattern that involves a queen and a knight. The queen traps the opponent’s king against the edge of the board, and the knight delivers the checkmate.
Example: If the White queen is on f6 and the White knight is on g6, and the Black king is on h8, the knight moves to g8 (Ng8#). The queen on f6 blocks the Black king’s escape, while the knight covers the final escape square.
Conclusion
Mastering checkmating patterns is an essential skill in chess, as it allows players to recognize winning opportunities and convert material advantages into victory. From simple patterns like the back rank mate to more complex ones such as Anastasia’s mate, learning these patterns will improve your tactical awareness and ability to close out games. Practicing these patterns will help you become a more confident and skilled player, capable of delivering checkmate efficiently and effectively.
For more about chess attacking strategies, click here